Backcountry Dream Ski Set-Up – Chillfactor’s Picks For Heading Out The Back
Mountainwatch | Matt Wiseman
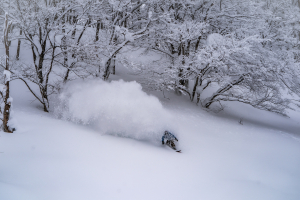
Backcountry skiing has seen an exponential increase in the last decade, evident not only in the number of skiers you’ll see on a trailhead or whose skin tracks you’ll cross but also reflected in the marketing and technological advancement of backcountry specific ski gear.
Ski touring is perched somewhere between type 1 fun – where everything is easy, happy, smiley fun times (e.g. riding heated quad chairs and skiing pow all day) – and type 2 fun – where everything generally sucks for the duration of the activity and fun is only realised in retrospect (e.g. skiing whilst raining).
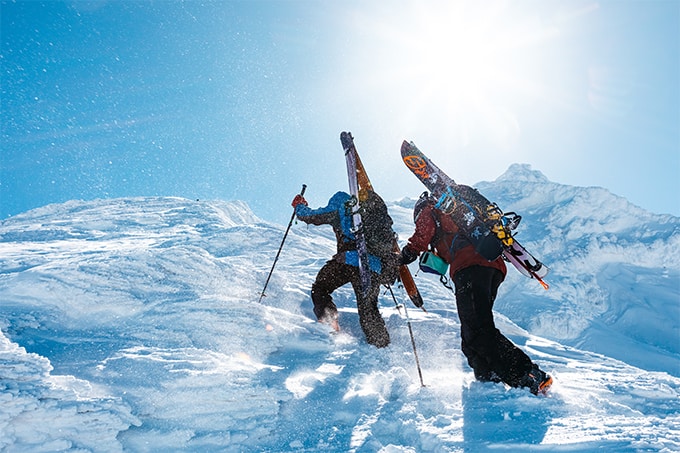
All things considered, we’ve compiled a list of essential items to help you in your quest to access this unique type of fun. Introducing the ‘Chillbacktor’ backcountry dream set-up.
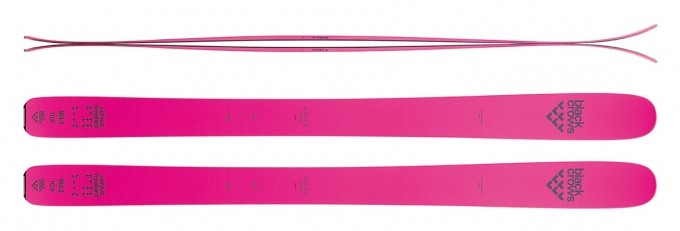
Skis – Black Crows Corvus Freebird
The obvious place to start when it comes to backcountry skiing is with the skis themselves. Unlike backcountry snowboarding, where those poor souls essentially have to take a hacksaw to their ride, backcountry skis aren’t much different from your typical front side planks. The most obvious difference however being weight – I speak from experience, as someone who lugged a pair of 4.4 kilogram Atomic Bentchetlers around the Japanese backcountry and on some painfully long tours all of last season.
While being lightweight and hard charging can be difficult traits to mediate, Black Crows is one brand that does a particularly good job of it. The touring specific freebird series, being an excellent place to start, with their layers of multi-directional fiberglass and carbon fiber, that give the skis a stiff and powerful feel that’s hard to find in other touring skis. The hot pink corvus freebird, is one particular model worth looking into, and being 109mm underfoot would be well suited to tours in the Australian Snowy’s and abroad. The Freebirds flat tail with its specific skin notch also makes skin attachment a breeze.
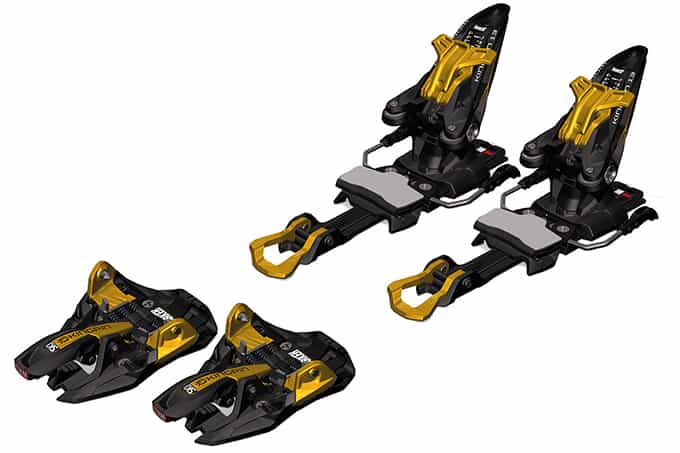
Bindings – Marker Kingpin 13
The crux on which ski touring hinges (pun intended), alpine touring bindings allow the heel to lift naturally while skinning uphill, and be locked down for the descent. A debate exists between so-called ‘frame’ bindings (designed for a mixture of resort and backcountry riding) and backcountry specific ‘tech’ or ‘pin’ bindings. However, as tech bindings are far lighter – given the ‘frame’ connecting the toe and heel piece is your rigid boot sole itself – they are unanimously preferred by the touring community.
It was the now discontinued Dynafit Beast that paved the way for a harder charging and more reliable tech bindings, a position that has since been filled by the popular Marker Kingpin. The Freeride performance of the Kingpin and security it offers as a 13-DIN binding that releases both vertically and laterally at the traditional looking heel makes it a solid and popular investment.
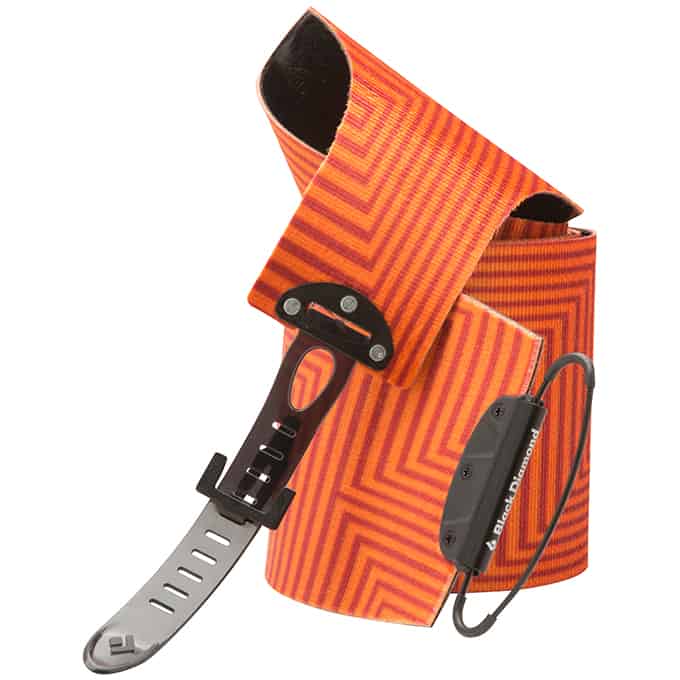
Skins – Black Diamond Ascension Nylon STS Skins
There’s no way you’re getting up that hill without skins on, and even with skins, it’s worth mentioning that not all were created equal. Black Diamond provides some of the best in the business, their nylon STS skins being no different. They don’t sacrifice glide for grip like other varieties, are 20% lighter and more packable than previous iterations and still retained their stickiness after half a dozen transitions I made during one single day of touring last season. A safe and popular bet.
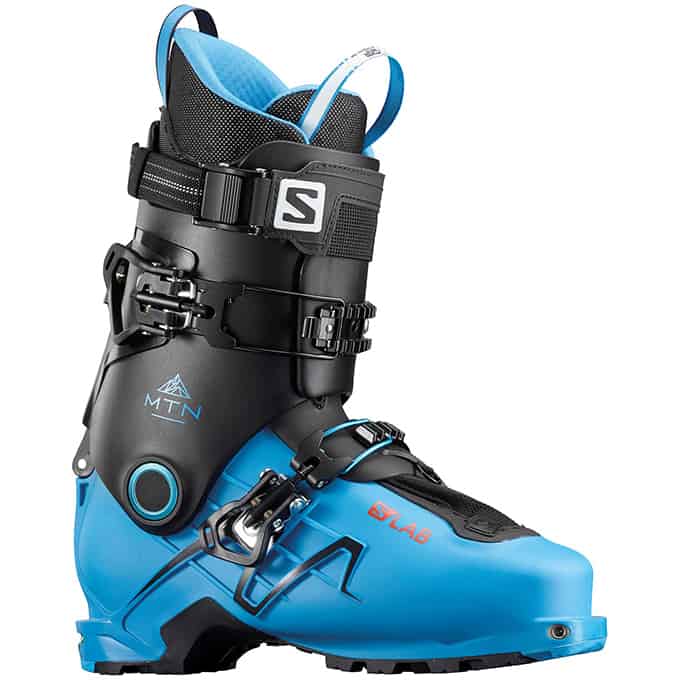
Boots – Salomon Mtn Lab
Compatible with ‘tech’ bindings thanks to their 9523 sole norm and pin-holes (the International standard for most dedicated skitouring boots), the Salomon Mtn Lab has remained unchanged ever since its debut in 2016. If it ain’t broke, don’t fix it right? Coming in at a 120 flex, and actually skiing like it, the Mtn Lab is as good on the uphill as it is the down, being just 1550 grams in a 26.5 and assisted by Salomon’s motionflex technology that grants it a 47 degree range of motion when in walk mode.

Poles – Black Diamond Traverse Ski Poles
Poles are more or less poles, but there are a few extra things to bear in mind when using them for ski touring. I personally own a pair of the Black Diamond aluminium traverse ski poles, and found they held up to a full season of abuse in Japan this year. I find collapsibility to be particularly important, whilst the lightweight rubber grip extensions allow you to adjust your hands and ‘choke up’ while sidehilling on the skin track. (Hint: a few rolls of electrical tape gives you the same result however).
![]()
Avalanche transceiver – BCA Tracker 3
A must have when venturing into backcountry terrain; even though we all hope to never have to use our avalanche transceiver (beacon) in a real life scenario. There are a number of options out there and BCA’s Tracker 3 is one of the best. Its fast processor crushes fine searches and its slick low profile design is a further bonus.
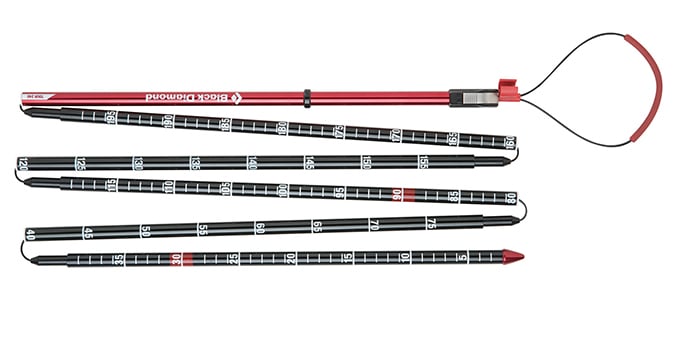 Probe – Black Diamond Quickdraw Tour Probe
Another essential. You simply cannot afford to be caught in the backcountry without a probe should an accident occur. The Black Diamond Quickdraw Tour probe features a durable aluminium construction, and at 240cm is ideal for lightweight tours and shallower snowpacks. Longer versions do exist however.
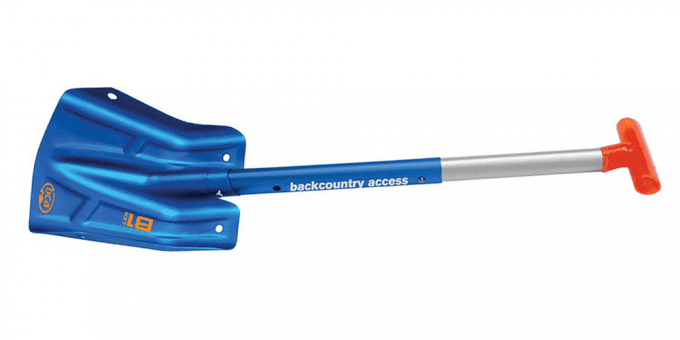 Shovel – BCA B1 Extendable Bomber Avalanche Shovel
The humble shovel is also one of the most important pieces of equipment in your backcountry arsenal. Not only is it a critical part of any avalanche rescue kit, a shovel can also dig a snow pit, an emergency shelter, dig in a tent or uncover a lost ski. I can personally attest to the terror at having to hand-dig for over an hour for a lost ski in bounds in Niseko.
The BCA B1 Extendable Bomber Avalanche Shovel is ergonomic, has a good sized aluminium blade and packs well. It’s also nicely priced.

Backpack
The type of backpack you need is entirely dependant on the type of backcountry skiing you plan on doing. Short jaunts off the chair or multi day hut trips, demand very different set-ups, and that’s before you even broach the topic of avalanche airbag systems (ABS). At the very least you want something big enough to house your shovel, probe and skins, as well as food, water and often an extra – layer/pair of gloves/sunnies/camera – etc.
AST 1 Course – Avalanche Skills Training 1
An AST 1 course is where you’ll learn the fundamentals of travelling in avalanche terrain. The course comprises a minimum of seven hours of classroom instruction and one hands-on full day in the field. It’s suited to people with basic training and little practical experience and is now offered in Australia – Check out snowsafety.com.au for more.
Know Before You Go!
Before heading out into the Australian backcountry this season, it’s essential to have a good understanding of what the snow is doing. MountainSportsCollective.org is a community led snow safety initiative to help better inform Australian backcountry users of the prevailing weather and snowpack conditions.
Check them out here.
Get out there, stay safe and earn some turns!
After some ideas for your next backcountry trip? Check out our shortlist of the best winter backcountry touring trips in the country here.
This article originally featured in Chillfactor Ski Magazine’s 2018 Gear Guide – Pick up a copy in stores now!