VIDEO TECH TUESDAYS Episode 1 – Base Care
| You need to have the Adobe Flash Player to view this content.Please click here to continue. |
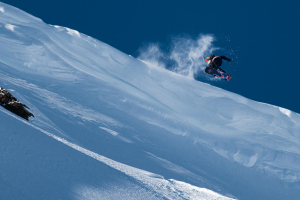
TECH TUESDAYS | Alex Horvath
TECH TUESDAYS are a new weekly installment that will aim to provide you with step by step instructions for often overlooked but super important techniques for getting the most out of your hard earned snow gear!
EPISODE 1: Ski/Snowboard Base Care, Step by step instructions
Ever wondered how it is that some people fly past you on even the flattest of cat tracks? Maybe you’re trying to grab that tiny bit of extra speed to finally hit the sweet spot of that jump’s landing? There is a pretty good chance that the answer lies in something that is so simple to do, but many people over look completely, yeah you guessed it, basic base care….
TOOLS NEEDED:
1. Waxing Iron – Specifically designed waxing irons are available from your local shop, these irons are designed for the task at hand and tend to have a slight contour on the heating plate to ensure proper contact between the surfaces, failing this you can grab that spare iron lying around in the laundry cupboard but make sure you don’t ever plan on ironing a business shirt with it again! Somewhere around medium heat will usually do it, the key is to not have the wax smoking. If using a clothes iron make sure you remove any water so you don’t end up steam cleaning your p-tex!
2. Edge Stone – This stone will enable you to remove any burrs that will be on your edge as a result of hitting rails or rocks through the season, having a nice smooth finish is important for proper performance. Also useful for detuning new equipment.
3. Base Cleaning Fluid – This solution will let you remove any old wax as well as any muck and grime built up during normal use.
4. Wax Scraper – For removing wax after it has cooled.
5. Scourer – To achieve a perfectly buffed smooth base, also useful for adding structure to the fresh base.
6. Wax – Last but definately not least is the actual wax to be applied, keep in mind that ski wax is a specially formulated compound that is designed to ensure maximum performance for a variety of snow conditions and temperatures, experiment with different waxes to find what you prefer.
STEPS:
Watch the video above for a step by step demonstration thanks to Nathan from Balmoral Boards. NB: the video demonstrates on a snowboard, but the process is exactly the same for skis, only you have to do both of ’em!
1. First thing to do is to use your edge stone to remove any knicks and burrs from your edges and give them a nice smooth finish.
2. Use a citrus base cleaner to remove any edge filings and dirt/grime from your base. Base cleaning fluid can also be used to remove any old dirty wax from your base.
3. Set your waxing iron to a medium heat, the key is to not have the iron so hot that the wax smokes, but not so cool that it won’t easily melt the wax onto the base. Using quick movements spread an even layer of wax along the base ensuring that every part of the surface from tip to tail is evenly covered. After this process the base should be left to cool for at least an hour or so. This will ensure that the wax is really able to permeate into the p-tex material.
4. Using a plastic or metal wax scraper on an angle in relation to the flat base, scrape off any excess wax that will be sitting on the p-tex.
5. Use a base brush or scouring pad to buff the freshly waxed base and ensure a nice smooth finish. If possible you can finish the base with a special horse hair brush to really add a nice structure to the surface ensuring the least friction between your base and the snow.
6. Clean up!
Ideally your base should be waxed about every 3-4 days of riding, this may vary according to the snow conditions. The best way to monitor when your base needs some attention is when you start to see some white “hairy” surfaces developing on the p-tex. Remember, wax to your base is like oil to an engine, stay on top of it and your equipment will always be fresh!